
Breaking the mould
Miniatures have never been bigger, exploding outside of their origins in wargames to conquer a new wave of modern board games and Kickstarter success stories. Thousands of unique models are created every year, spanning from historical troops and sci-fi inventions to imitations of movies, video games and famous faces. Although you’ve probably handled hundreds of plastic figures in your lifetime, it’s unlikely you know how they’re actually created – a process that has remained largely untouched for decades.
Ricky Dove has been working with miniatures and moulds for around a decade, having found his way into the manufacturing side of things after starting at Games Workshop as a receptionist. After seven years working in the Warhammer company’s Forge World and resin divisions, Dove eventually moved to Kings of War and The Walking Dead: All Out War studio Mantic, where he is now the resident master mould-maker.
We recently visited Mantic’s Nottingham HQ, where Dove took us through the complex, challenging and even dangerous process that turns miniatures from one person’s vision into the plastic and metal figures on your tabletop. Here, from beginning to end, is the story of those miniatures.

Designing figures on a computer and then 3D printing them significantly cuts down the time required to create prototypes – with copy and paste especially helpful!
Every original model begins in the imagination of its sculptor. In years gone by, this title was quite a literal one, with creators physically hewing their vision out of a small block of plastic – often helped along by the addition of detail using modelling putty. Nowadays, it’s becoming more and more the norm for sculptors to work with a virtual scalpel, refining a 3D render on a computer over the course of two to four days, depending on the level of detail.
While digital modelling is becoming more commonplace – the characters in Mantic’s recent Star Saga were all created digitally – the traditional approach is still used in some situations.
“It’s really the studio’s decision,” Dove says. “It goes on a costing thing, I believe. Or basically how much time the sculptors have got. We don’t have any in-house sculptors ourselves – it’s all contracted out. So it depends on who’s free and when.”
Working with pixels instead of plastic has a number of benefits, including the ability to easily rearrange or re-pose parts of a model on the fly, re-use parts from past figures, and convert existing creations with greater ease. Sculptors can also copy and paste elements of a 3D model, which can cut the time needed to craft a symmetrical model literally in half.
Once the virtual version has been refined, it’s printed out using an industrial-grade 3D printer that produces layers measuring just 16 microns – or 0.016mm – thick. While the layers are just about visible in this prototype model, the slight loss of detail during the subsequent casting process means the finished miniature will appear perfectly formed.
“Obviously it’s going to be a copy, so you will lose a little bit,” Dove says. “That’s where the art comes in, to make the best copy we can in the end.”
Digital modelling and 3D printing are beginning to revolutionise the way miniatures are created, but their convenience comes at a cost.
“There’s definitely an advantage [to digital],” says Dove. “If the original sculpture gets destroyed, I’ve got nothing to go back to, whereas if it’s a 3D print your file is your master so you just print another. But it’s expensive to end up printing models at that level of detail; the last time we had a 3D print run it was like a grand.”

Early models can be easily modified using modelling putty such as Green Stuff, allowing sculptors to quickly add extra details without needing to start completely from scratch.
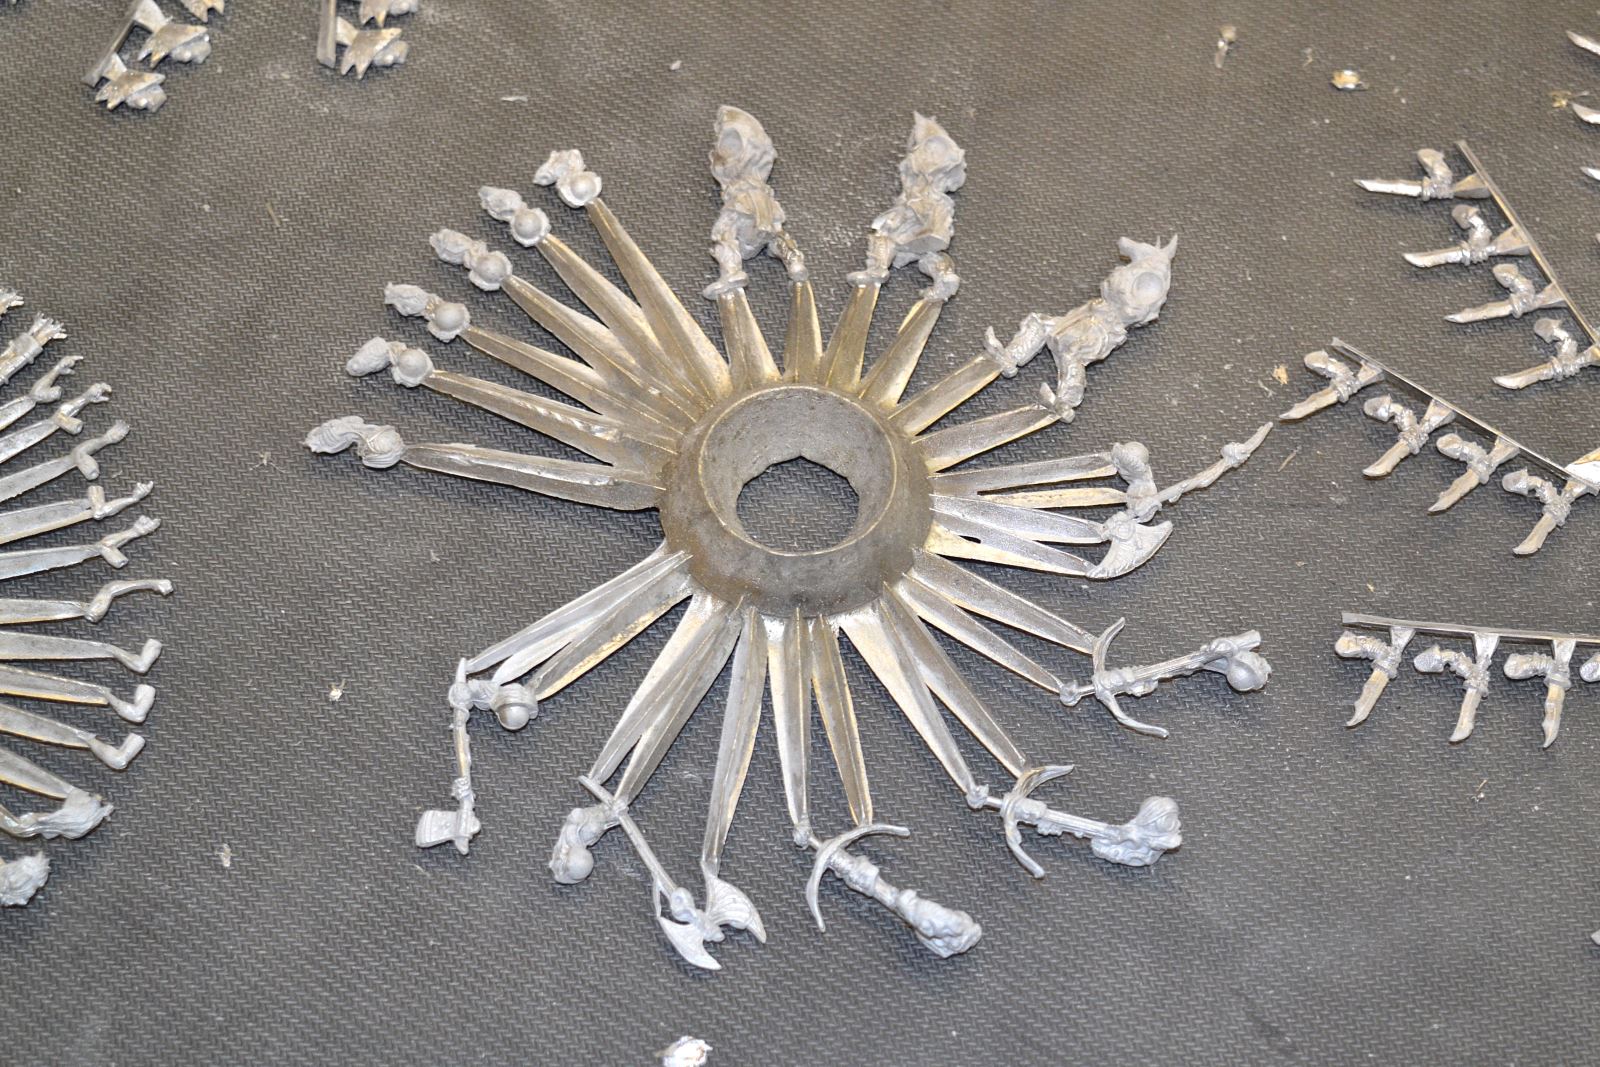
With the final model in hand, it’s time to take the figure from being one-of-a-kind to mass-produced. This first requires creating a master mould from silicone. For a metal model, the mould consists of two circular discs that go together on top of each other, creating the shapes of parts of the figure in the middle. Later, hot liquid metal will be poured into the hole in the centre of the disc as it rotates, flinging the material into the holes and forming the pieces of the miniature.
“When the silicone is in its raw state, it’s kind of like plasticine – it’s very, very soft,” Dove explains. “It’s just like a little pizza, you drop it down. You have to cut it to shape and everything. You insert the mould and press the mould in nicely. Lay them out exactly how you want them to be. Then you’ll add another layer on top. Put a release agent on top to stop them bonding together. There’s match marks that you insert as well. That’ll go into a press, the press will put it under high pressure and bake it at about 170, 180 degrees Celsius to vulcanise it so that it goes hard and rigid. Once that’s done, you can take it out and it’s cooled down. It takes about two hours to vulcanise and then a few more hours to cool down properly.”
Due to the way the metal feeds into the holes from the centre of the spinning mould, channels must be cut by hand to allow the material to find its way into the shapes.
“All these cuts are angled so they come to a point,” Dove indicates. “When it’s filling, because you’re having the same volume of metal compressed into a smaller and smaller space, it acts almost like a firehose and fires the metal into the cavity, giving it that extra oomph to get in there – and allows you to snap it off nice and easy, as well.”
Equally important is creating vents to let out the displaced air – which, as it turns out, is more complicated than it sounds.
“Metal’s going to flow in, but the air’s got to go somewhere, so it’s going to push it all the way out,” says Dove. “Everything’s kind of zig-zagged to make sure it doesn’t just fly out the sides or anything like that.”
.jpg)
The machine used to generate the centrifugal force required to fill every little hole and crevice with material.
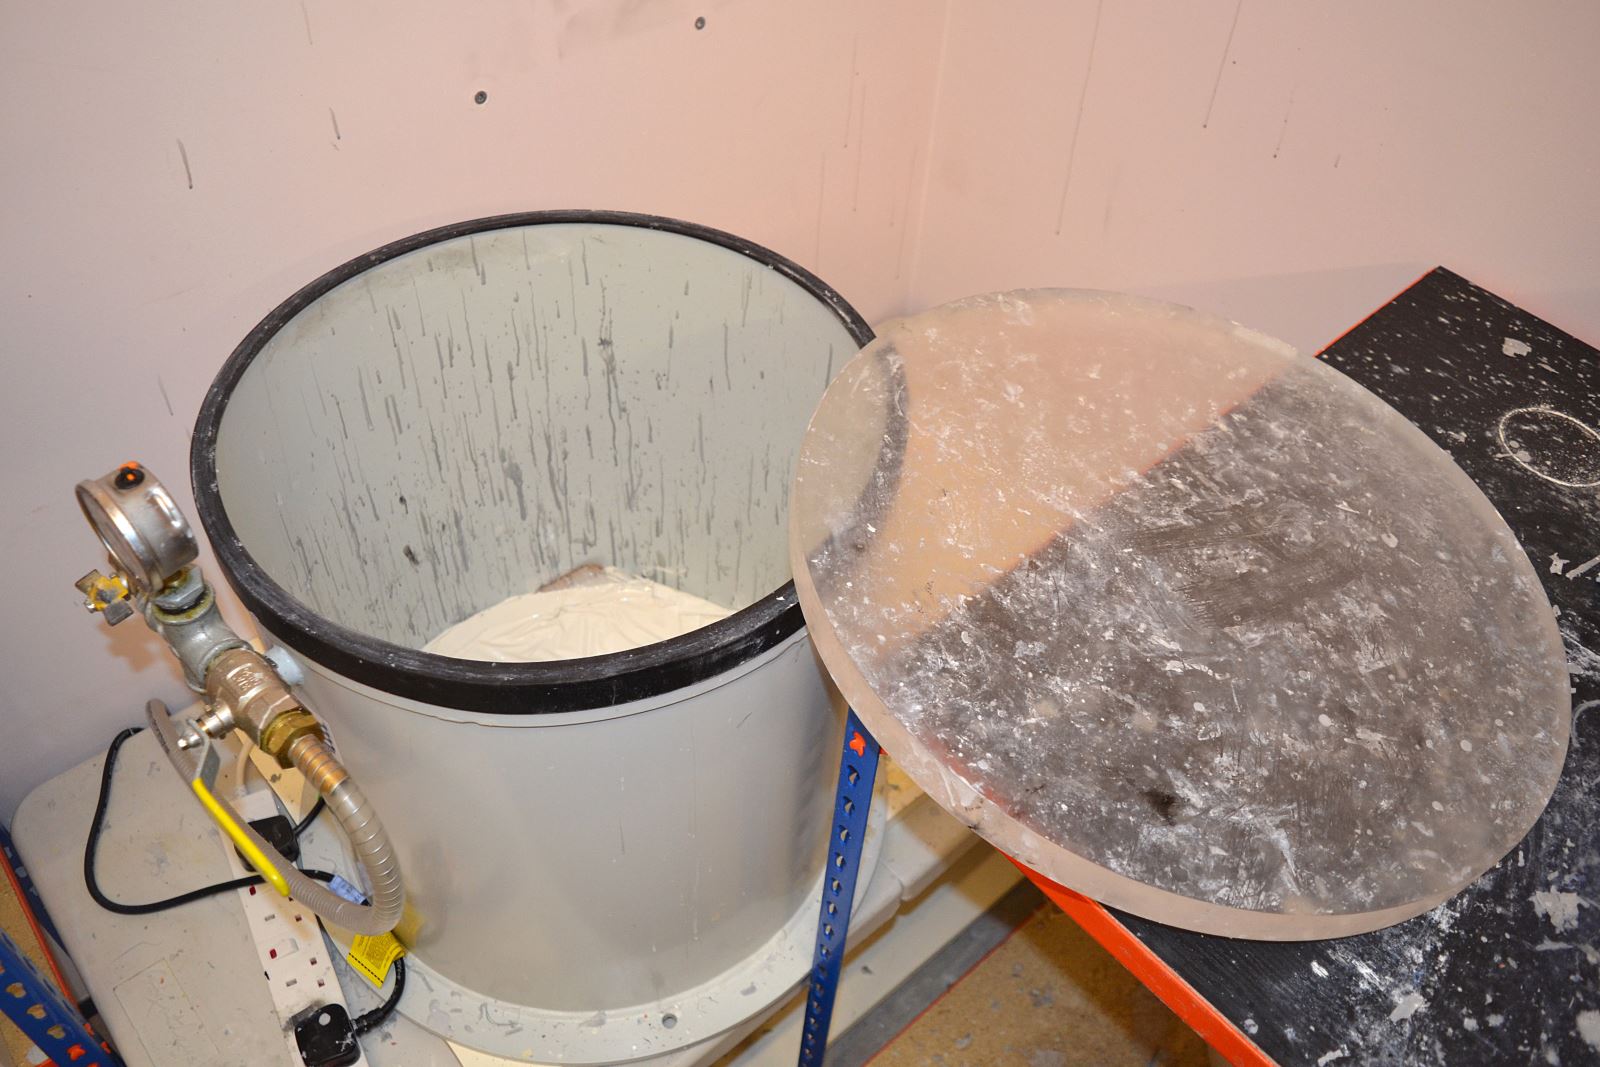
Resin models are created in a slightly different way, using the force of a vacuum rather than a centrifuge to fill every nook and cranny with the liquid plastic and ensure models emerge fully formed. The feeds are once again added manually, with rods forming each model’s sprues.
“We have a master copy and that’s put into a silicone mould again, but this silicone mould is RTV [Room-Temperature-Vulcanising] silicone,” Dove says, holding up an example. “So it goes off and doesn’t need any heat. This one has a platinum catalyst that gets added to it and it will set within 24 hours. Once we’ve set the piece up in a box, we fill it, we leave it a day or so after we’ve added the addictive, we vacuum it before to remove any air bubbles or anything so there’s nothing in the way, no extra detail that’s going to get stuck on the sides or anything like that.
“Once we’ve taken the box away, it’s set and everything, we can go through with a scalpel and cut it so we can get the piece out in the centre. They’re all match-marked along the edge, so they will go back in the same place every time. The master silicone is quite a rigid and firm material, so it doesn’t want to move or go anywhere and gives us the best impression so I don’t have to spend ages cleaning it afterwards. It gives us a really good copy.”
Once a small number of miniatures have been created using the single master mould – Dove says anywhere between three to ten models depending on the size and total number required – the figures are cleaned up using a file and magnifying glass to make them as accurate as possible to the original design. These figures are then pressed into what’s known as a production mould, which produces multiple copies of each component ready to be packaged into boxes. The metal moulds remain the same size and shape, while the resin mould becomes a concertina-like block that can be flexed to release the parts inside.
“We do it in a large block mould because obviously a rectangle holds itself together,” Dove says. “They’re all match-marked again. Instead of doing the zig-zag, because that’s very difficult for the caster to keep putting back together every time, we just do one single cut with a special knife with a curve in it. Just cut straight down and that matches it.
“When we run the first mould, we only get one copy, but we run these two moulds and we get three copies with a larger piece.”
With more complex models, this can mean using multiple moulds to form all of the parts required for a single figure.
“Wyrmriders [for Kings of War] are the most we’ve done,” Dove recalls. “I think it’s seven moulds. And then you only get three models.”
The vacuum chamber used to suck the liquid resin into the moulds in a matter of minutes.
Once a resin production mould is ready to be filled, the silicone block is sprayed with a mould release agent to stop the concertina sticking together – and potentially snapping bits off models as they’re removed. Boards are placed around the sides of the block and pressure applied with elastic bands to eliminate unsightly mould lines as resin leaks out. Secured, the mould is placed in the vacuum chamber.
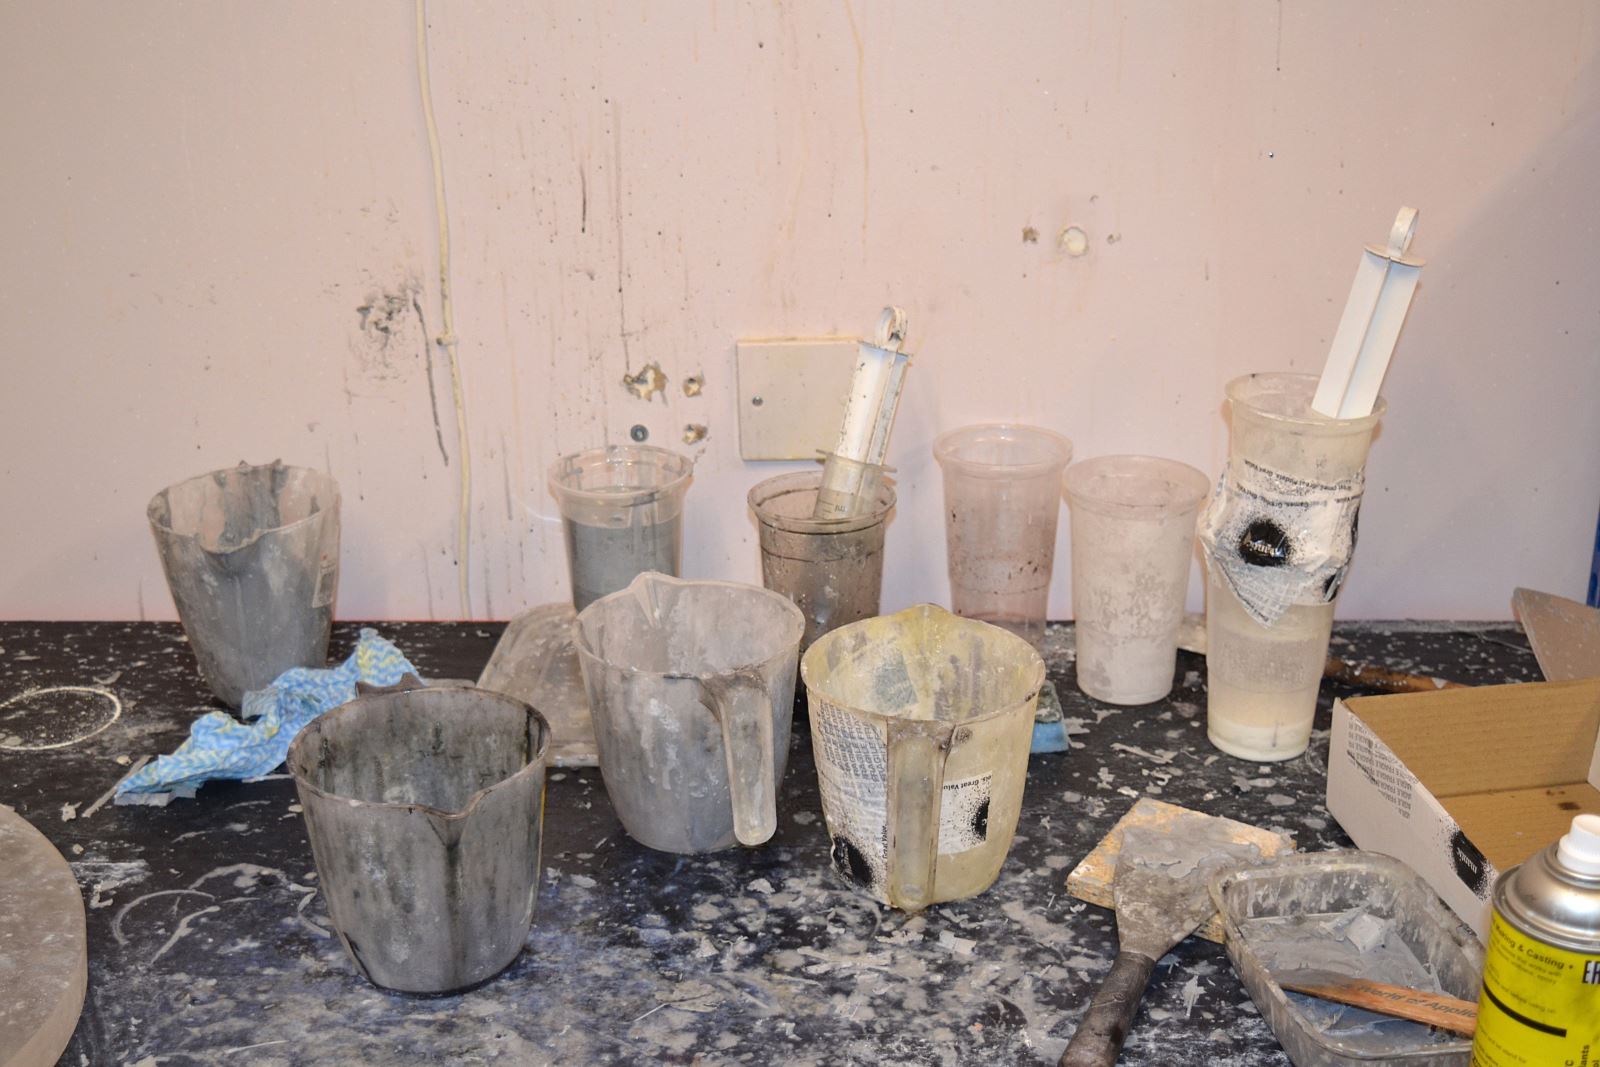
“This is really the only bit of actual equipment for casting,” Dove comments. “Everything else is just mixing tubs, things like that; it’s done by hand.”
Before the air is sucked out of the chamber, the mould is filled with a two-part resin made up of a liquid plastic and isocyanate – a potent chemical also found in glues, paints and flooring that has been linked to asthma and other respiratory issues. Luckily, the dangers are completely gone by the time you’re picking up your figures. (We still wouldn’t put them in your mouth.)
“The isocyanate’s a bit nasty and not very nice, but as soon it’s cast into the resin it’s inert and it’s completely fine,” Dove reassures. “It’s just an exothermic reaction between the two components that turn into the resin.”
Getting the mix of liquid plastic and isocyanate right is key to ensuring models don’t end up bendy.
Mixing the chemicals is where the magic happens, as the two liquids combine to become the familiar rigid plastic of models. Getting the mix exactly right is crucial.
“It’s a 50-50 mix,” Dove says. “You have to get it right because that affects the overall finish on the end product. If there’s too much of one it’ll be bendy.”
We’ve all opened a game to find spears that looks more like spaghetti or characters trying to copy Michael Jackson’s ‘Smooth Criminal’ lean. This can be down to a bad batch, but in most cases it’s more likely to be a deliberate choice.
“It’s just a type of material they’ve chosen to use,” Dove suggests. “It’s probably cheaper. Also, it allows it to be de-moulded easier. So if the material has got some flex and bend in it, then it’s not going to snap and get left in the mould or something like that. It probably helps with speed of process and it’s probably a slightly cheaper material.
“Resin can be as hard as plastic or soft and bendy. It just all depends on which specific resin you’re using and how you mix it. You can tailor it exactly to what you want it to do.”
This includes the ability to customise the colour of the plastic used. Dove explains why some board games might come with multicoloured player pieces while traditional miniatures tend to come in similar shades of grey.
“Resin, in its raw state when you cast it, is white,” he says. “White you can’t see anything, detail and anything like that. So we actually put a black colourant in it to turn it grey. As soon as you turn it into the grey, the detail just pops. You can do whatever colour you want.”
Whether the aim is to have flexible pieces that can survive being chucked around in a box or hard miniatures primed for painting, it doesn’t take long for the chemical reaction to happen. Only a few minutes, in fact.
“It’ll go in [the vacuum chamber] for a minute and a half, then the operative will allow some air back in,” Dove explains. “Then they will pop up anything required – so if all of the resin has gone out of the well, they’ll top it all up and that’ll go on for another minute and a half. Then it’ll just come rest on the shelf for, let’s say, five minutes.”
After that, the components are ready to be popped out of the mould and packed into boxes before the cycle starts all over again. Each successive run takes its toll on the moulds, however.
“They only last for about 30 cycles, so they don’t last very long at all,” says Dove. “It’s probably one of the reasons resin models are slightly more expensive to buy.”

A resin model production mould filled with material.
Watching resin form into models is interesting, but it can’t quite match the most exciting – and arguably dangerous – way of creating miniatures. But even with the thrilling use of hot liquid metal and a spinning centrifuge, there are some surprisingly mundane aspects of casting metal models.
“The mould’s covered in talcum powder because that’s what we use as a mould release agent,” Dove reveals. “Plain old talc. It allows the metal to flow over the top of it. When any material sets, it tends to grab because, on a microscopic level, everything’s pitted and marked everywhere. Talc allows it to take up that space, so it grabs onto the talc instead of the mould. So when you pull it out it’s not going to latch on and rip. It also gives you a nice matte finish because metal, when you cast, tends to be shiny. When you’ve got the talcum powder or cornflour, whatever you use, it just takes the shine off it.”
The two circular discs are put together and clamped into a machine that raises the platform up and begins to turn it at an incredible speed. As it rotates, Dove scoops a single spoonful of liquid metal from a bubbling pot and pours it into the centre of the spinning mould. It’s not a lot of material, but the compression of the mould means it goes a long way. As for knowing when enough’s enough, that comes down to practice.
“You can hear, you can see,” Dove says. “When you’re pouring, as soon as you can see a wall of metal coming back towards the centre, stop. You can also hear it sucking, so if you just know the change you can do it; nearly full, nearly full, done. Occasionally you do miss or pour a little bit too much in, but it’ll ball up on the top and it’s an immensely smooth surface so it just pops off.”

The metal is kept at a consistent 400 degrees – making it a potentially dangerous task to pour it into the spinning mould.
Despite the relatively small amount of material used and safety measures in place, the incredible heat needed to turn metal into a liquid makes casting an obviously dangerous job.
“You burn yourself all the time,” Dove admits. “It’s only ever little bits and bobs you notice. It’s a bugger when it flies up and gets in your beard or something.”
And if you should happen to come into contact with more than just a ‘bit’?
“It’s not good,” Dove says frankly. “The shock is enough to kill you, to be honest. You get anything more than a 50p piece it’ll hurt you so much you’ll probably pass out.”
Assuming you avoid death and injury, two minutes or so later a perfect cast is ready to be removed from the machine. Or almost perfect cast, anyway.
“The quality on resin models far out-surpasses the metal,” Dove says. “Metal cools – when it cools, it shrinks. So whatever detail it fills, it kinda shrinks a tiny bit back in. So when we transferred some models into resin, a lot of people noticed detail that they couldn’t see on the metal.”
The quality of resin comes at a cost, though. While resin moulds only last for a few dozen cycles, the silicone used in metal moulds means they’re far more economical for miniatures makers to use.
“The old-school black rubber ones you get about 200 casts out of them,” Dove says. “The new-style silicone moulds we’ve been trialling are getting anything up to 400 casts. It doesn’t sound like much, but if you’ve got ten copies on a mould and you can run it 200 times it’s a decent amount of models.”
There’s another big benefit to using metal. As he talks, Dove drops a leftover set of metal sprues into the simmering pot behind him. The scrap instantly liquefies, leaving behind a skin on the top of the 400-degree metal that looks like the worst custard you can imagine.
“The material’s been oxidising,” he explains. “I put the old stuff back in to be reused. The central gates we can just melt back down again, because obviously it’s not product. It’s got a load of talc and other things we don’t really want, which in the industry we call dross. We skim it off just like soup. That will end up going back to the company, and they will sieve out and distil out any of the metal still left in there and reclaim it back. It’s quite efficient at using material. You can get away with reusing some of the resin, but only if you do large models because you can chuck a load of old models inside the large one and then pour fresh resin around the sides.”
Being able to use as much metal as possible counts, because what resin loses in thriftiness with its moulds, it makes up for when it comes to the plastic itself.
“Metal is purely a material cost,” Dove says. “If it’s in actual physical material, it probably costs about £3.50 or £4 of metal in a set of [Kings of War] Molochs. It’s probably 20p to 30p worth of resin, so there’s a massive difference. All your cost in resin comes from your man-hours: labour, moulding costs, that kind of stuff. The actual material is quite cheap, but it’s all the other costs around it. Metal is the opposite; it’s quicker to produce, but the material costs you. You pay for it by weight and metal weighs a lot. But the detail on resin blows it out of the water. And it’s exactly the same master copy we used to make both, the same sculpt.”
A finished set of components from a metal production mould. The secret to getting them out smoothly? Plain old talcum powder.
Injection moulding is perhaps the most recognisable way of creating miniatures, forming the iconic sheets of model parts that need to be clipped off of their surrounding rectangular sprues.
The core process is similar to casting by hand, but instead of using a vacuum or centrifugal forces to distribute the liquid material through silicone moulds, powerful machines blast PVC plastic into metal moulds.
“It’s something I’ve never done myself, because it’s very specialist,” Dove says. “Their moulds are solid steel blocks and the machinery required to cast them are like 12-tonne machines. It’s forced in, injected in, with a lot of force. It’s a steel block – it’s not going anywhere.
“There’s a lot more effort that goes into making those because it’s a steel block and it won’t give. Everything needs to be able to pop out. It can’t have any undercuts because you’re going to be able to bend them out the way. There’s a lot more thought process that goes into making one of those. That’s why they’re a lot more expensive to make in the first place. Cheap to churn out the plastic in the end, but expensive to get the mould and everything done in the initial stages.”
The cost, training and space needed to injection mould means that it’s a method usually reserved for proven hits guaranteed to return on the investment and publishers able to invest a significant wad of cash in the first place.
“A steel injection mould’s going to cost you £5,000 or something to have made,” Dove details. “[A silicone] one costs £90. There’s a bit more cost that goes in because there’s been a mould that’s previously been made, there’s been a lot of time that’s gone into it and that kind of stuff, but the physical mould is £90.”
However, the price of injection moulding is becoming easier to stomach for smaller companies thanks to the advent of crowdfunding through sites such as Kickstarter. By reeling in supporters with 3D renders of their miniatures and successful campaigns gathering a specific amount of money before manufacturing their pieces, studios can invest in injection moulding safe in the knowledge they already have a hit on their hands.
While most of Mantic’s models are created in-house with resin and metal, the company has turned to injection moulding for some of its own Kickstarted products, including the Terrain Crate scenery kits.
“They’re got an awesome mould life,” Dove says. “Cost you a load, but you’re moulding thousands.”
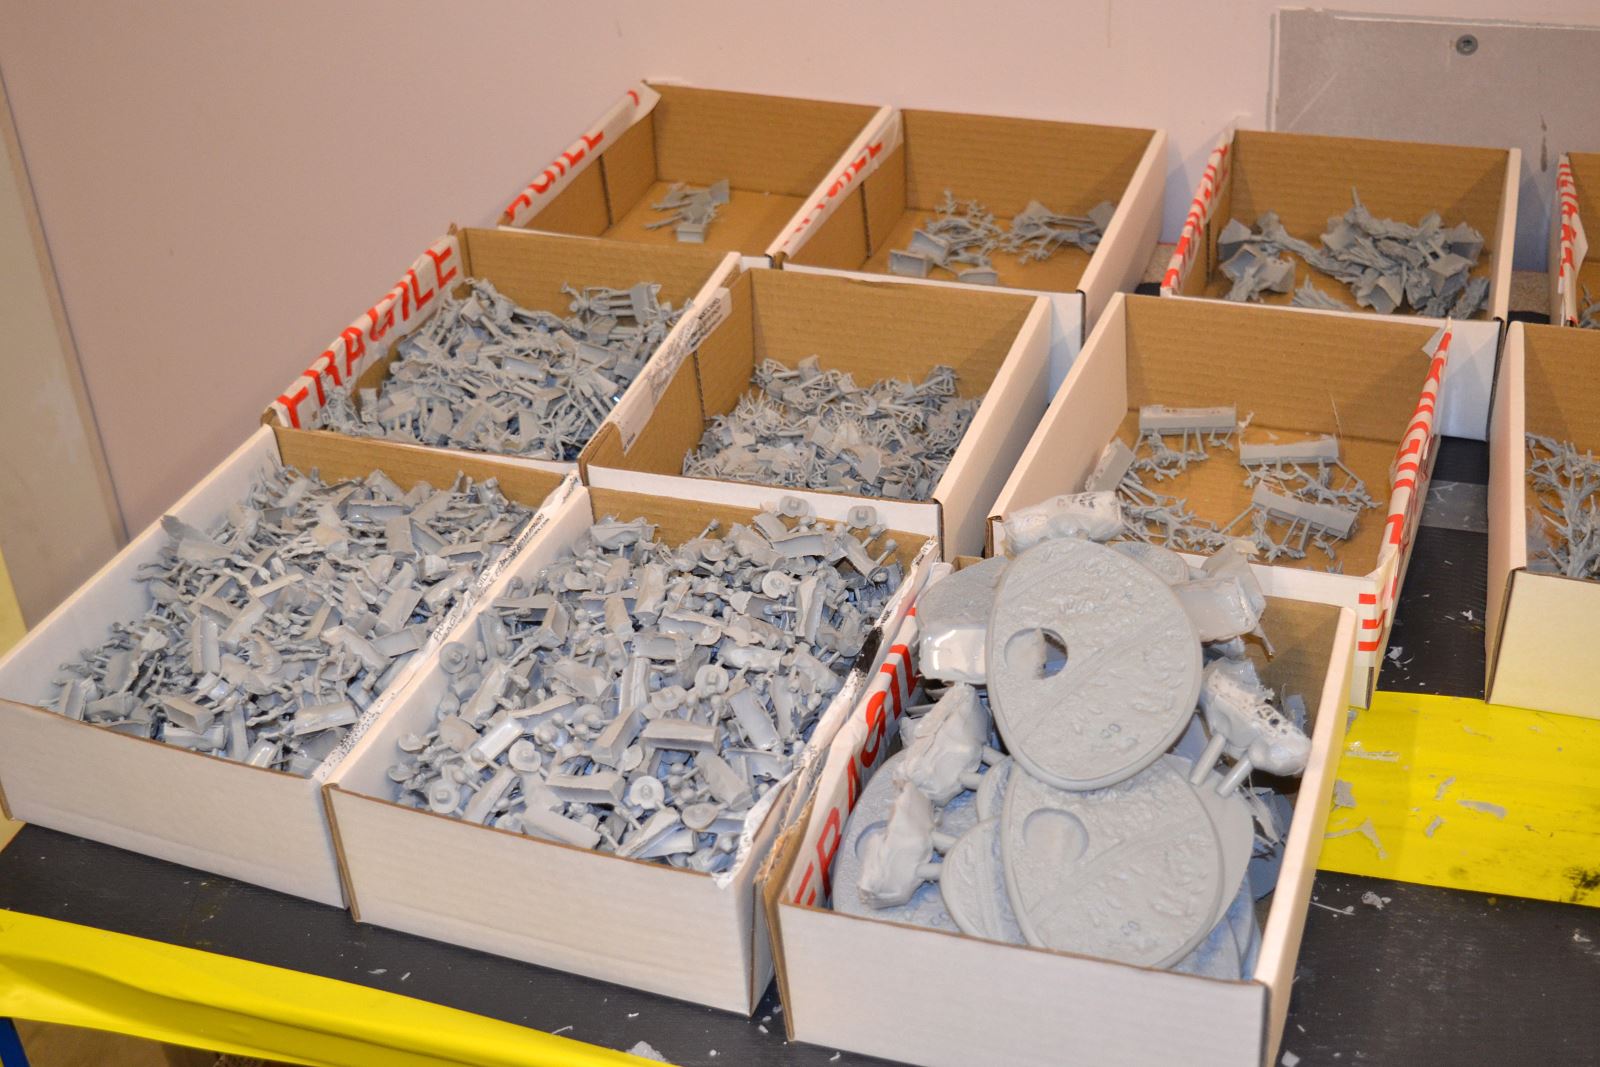
Finished resin models ready to be packaged in boxes and shipped out to shops. The moulds only last for around 30 cycles, which is one of the reasons why resin models can end up costing more to buy for players.
With a batch of miniatures ready to land on shop shelves, it’s time for the process to begin all over again. The time taken to churn out a single set of figures may be quick, but the manual requirements of the job mean that making sure there are enough miniatures for potentially thousands of players can be taxing.
“You only really get six cycles in throughout the day because it takes 35 to 40 minutes for the resin to actually set once you’ve mixed it together,” Dove says. “It’s not like metal, because the metal is purely based on heat, so as the metal cools it sets solid. It’s quite a quick process because all you’ve got to do is cool it down and metal likes to give off heat, so as soon as you put it in, two and a half minutes later it’s set and ready.
“It’s about six cycles a day, so about 35 copies of most things really in a day. With ten in a mould, about 60 a day maybe.”
It’s a similar story across the world of miniatures, with the decades since Games Workshop first produced its Warhammer models seeing little deviation from the tried-and-tested methods of making figures.
“Just the materials and the chemicals have been improved,” Dove observes. “Different mould release agents that work better, that kind of stuff.
“In all honesty, if you look at the process, techniques haven’t changed for hundreds of years. It’s exactly the same. It’s just we’ve changed materials and modified. In general, it’s not that much different.”
So the next time you’re gluing together a plastic torso or painting up a metal laser rifle, perhaps think back to the people, hours and history that led to it finding its way to your table.
MATT JARVIS
This article originally appeared in the February 2018 issue of Tabletop Gaming. Pick up the latest issue of the UK’s fastest-growing gaming magazine in print or digital here or subscribe to make sure you never miss another issue.