


01 March 2022
|

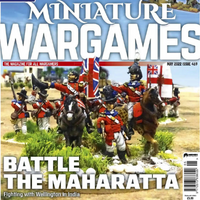
The last time that two crowned kings of England, Scotland and Ireland faced each other in battle
Words and pictures by Conrad Kinch
INTRODUCTION
My first introduction to the Battle of the Boyne, like most things in my early life, involved being yelled at by a teacher. We were on a tour of Saint Patrick’s Cathedral in Dublin and I had paused to sit in a chair. This turned out to be the chair in which William the Third had sat while listening to the Te Deum being sung in the Cathedral after his victory at the Boyne. In those more unregulated days, this piece of history wasn’t in a glass case or behind a rope, so I can confess that I have briefly, if not stood in William III’s shoes, certainly sat in his chair.
Of course, it was a brief encounter as my teacher let a roar at me and I leaped up like a scalded cat, only then noticing the small card on the seat which explained the provenance of this particular piece of furniture. Thankfully that is the only occasion in which my arse imperilled a historical relic. At least so far...

WHY WAS THIS BATTLE FOUGHT?
The Battle of the Boyne is the largest battle to have ever taken place in Ireland with about 60,000 men engaged all told. While it is remembered as a purely religious conflict, it was actually more of a proxy war between Louis XIV of France and his enemies. In the late 17th century, there were two powers in Europe; France ruled by Louis XIV and everyone else. Europe was divided into those who wished to contain France and those who wished to shelter under her power.
As a Napoleonics man, dipping his toe in the Marlburian period for the first time, there’s a lot going on. There’s this whole League of Augsburg thing (you should look it up) and I fear there may be more books in my future.
James II was a Roman Catholic King of a largely Protestant country. He attempted to implement in England the same sort of absolute monarchy of France that existed in France. This led to a sort of coup-cum-management buy out, where Protestant magnates in England brought William of Orange across to take the throne. This was done on the understanding that he would still respect the prerogatives of Parliament. William who was the Stadtholder of Orange in the Netherlands had already been fighting the French for years. He saw in the throne of England the chance to take an ally out of Louis’s pocket and put it in his own camp. When the Dutch landed, James prepared to fight, but was badly rattled when there were several high profile defections from his camp to the Williamites.
James’s nerve broke and he fled to France. William consolidated his power, but Louis, eager to occupy his foe, convinced James III to lead an expedition to Ireland, where he would be a thorn in England’s side. The largely Roman Catholic Irish wished to rectify the injustices of the Cromwellian settlement and rose for James.
After rather sluggish campaign by the elderly Duke of Schomberg, William landed and marched on Dublin. James met him near Drogheda, north of Dublin and the two armies faced each other over the river Boyne.
THE ARMIES
The armies at the Boyne were a mixed bag. The core of Williams army were his Dutch troops as well as Danish mercenaries. These infantry men were tough, disciplined professionals armed with flintlock muskets. These were joined by some Germans and Huguenots (French Protestants) who had fled persecution in their native land. His English and Irish regiments were more variable: a veritable smorgasbord of green recent recruits, professionals who had previously been in James’s service and other unreliable characters. As a result, they were mostly left in reserve and the hard fighting was done by the Dutch, Danes and other continentals.

On the Jacobite side, the situation was almost entirely reversed. James had 6000 well trained French troops and didn’t commit them. They served to cover the retreat of the army towards the end of the day, but were not engaged in the battle proper. The main fighting force was about 20,000 Irish troops. This army was raised by Tyrconnel who preferred Anglo-Norman Irish Catholics, but was obliged to enlist the Gaelic speaking Irish to make up the numbers. They were mainly armed with matchlocks.

The Jacobite cavalry were particularly impressive: predominantly recruited from the Anglo-Irish squirearchy, they provided their own horses and weapons and were extremely aggressive. A similar situation I think to Prince Rupert’s cavalier horse at the beginning of the English Civil war. They were to win fame under Sarsfield during his celebrated raid on William’s artillery train outside Limerick.

THE BATTLE
The Williamite army outnumbered the Jacobites by 36,000 to 24,000 or thereabouts. William sent a quarter of his troops in an outflanking movement, which James countered by sending a large portion of his men, including his French infantry, the best in his army. These two forces accomplished little but an artillery duel as they were unable to come to grips due to the boggy nature of the ground.
William’s Dutch Guards accompanied by some other troops then forced the ford near the village of Oldbridge and advanced across the river, under fire. They were badly knocked about, but carried on defending the bridgehead from repeated Jacobite counter attacks. A charge of Jacobite cavalry dispersed some of the Williamite infantry that crossed, but the Dutch held on and the James gave the order for the Jacobite army began to withdraw.
The Boyne was not a particularly bloody battle, with about 2000 casualties all told. Neither William or James were master tacticians, but they both had plenty of professional advisers. Brigadier Peter Young was of the opinion that soldiers morale was less decisive than the morale of their leaders. I think it is an arguable point but definitely one which stands up with regard to the Boyne. William was absolutely determined: he faced multiple setbacks throughout his life and kept going. He took he hard decision to flood Holland by opening the dykes, rather than let it be taken by the French. James as was evidenced by his flight from England after Williams landing at Torbay, was more easily rattled. At the Boyne, he could have fought on and perhaps kept his kingdom, but in reality he lost his nerve yet again and cheesed it back to France.
His Irish soldiers promptly began deserting on the not unreasonable grounds that if the King didn’t fancy hanging around: and why the hell should they? It is said that James fled back to Dublin after the battle where he encountered Lady Tyrconnel, the wife of one of his generals. He remarked to her that the Irish soldiery has run fast, to which she replied that they might indeed run fast, “...but your Majesty seems to have beaten them here”.
WALKING THE FIELD
Battlefield tourism isn’t really a thing in Ireland and there are relatively few signposted walks that you can go on. The Battle of the Boyne is the exception here. There is a visitors centre, which for the princely sum of five euro, will give you a quick run down on the battle using a topographical model and a rather impressive laser show. I was a bit skeptical when the lady at the desk described it to me, but it actually looks like you were watching a sequence from a computer game play out in front of you. There are some artifacts to examine, a mocked up Williamite and Jacobite camp and a rather well stocked artillery park.
You can explore the field yourself, but there isn’t a walking guide available in the Visitors Centre, though I am told by the staff that they are working on one. While the Visitors Centre is pleasant enough (and does a good lunch), to get the most out of your trip, you will need to get a book.

COMMANDS & COLOURS: THE BOYNE
We used an adaption of Commands & Colours: Napoleonics for our Boyne scenario on the grounds that we were only dabbling in the period and better the Devil you know. It seemed to work well for what we wanted. Since then Commands & Colours: Tricorne has been released which focuses on the American Rebellion, but there is a Jacobite supplement coming. Unfortunately, it doesn’t cover any of the Irish battles, but I’m sure a bright lad could convert our scenario without too much trouble. You could if you wish, use the Tactics cards from Expansion 5 Generals, Marshalls & Tactician, but we didn’t playtest this with them, so they could end up skewing things badly. So: on that basis:
THE BOYNE
- Victory: Six Banners
- Jacobite: 4 cards
- Williamite: 4 cards
Williamites move first.
SPECIAL RULES
- Leaders: Play as normal, but be aware of the “Big Show” special rule.
- Infantry: Infantry are four stand units, made up of four musketeers. They shoot as normal, rolling one die per musketeer stand. Some units substitute a pikeman for one of the musketeers. Units with a pikeman may ignore one flag from cavalry attacks. Pikeman attack as normal in melee, but may not shoot.
- Infantry did not form square in this period, trusting in their pikes to see off enemy cavalry, so infantry may not form square during this battle. The Jacobite Irish Infantry were recently raised and not well armed, though apparently they were equipped with matchlocks rather than pikes. The Irish infantry are rated as militia.
The French infantry were hardened professionals and are rated as such. They should be treated as French Line (i.e. +1 in melee).
Williams Foot Guards are tough customers and should be treated as standard infantry, but are allowed to ignore one flag.
- Guns: Guns are made up of three stands and are classed as foot artillery. Once deployed they may not be moved except using the Le Grande Maneuvre card.
- Cavalry: Cavalry are three stand units and otherwise use the standard rules.
- Big Show: Both heads of State are on the field and this is a battle for succession. In the event that either of James or William are killed, the other side will automatically win.
The River Boyne is fordable along its entire length, but the marked ford is treated as clear terrain.

FIGURES
The figures we used were from the Irregular Marlburian range, which were smallish 20mm, and painted up rather well. They were painted by Mr Takacs Krisztian and are now in the collection of John Cunningham. There are plenty of options in 28mm and 15mm and 6mm so availability of figures isn’t a problem.
One option which may horrify purists (but which I’m toying with myself) is the Peter Dennis’s War of Spanish Succession Paperboys book. This is cracking resource for figures aimed at Marlborough’s campaigns in Flanders. You colour photocopy the figures out of the book and cut them out, which is both quicker and cheaper than assembling and painting figures yourself. Unfortunately while the uniforms are quite close particularly if you’re willing to recolour the odd cuff here and there, the tricorne is worn almost exclusively. Troops at the Boyne wore much less shaped headgear, which was rather more floppy than the neated pinned and taped tricorne worn by the later troops. I’m not sure if that’s a compromise I’m willing to live with yet...
SOURCES
Great Battles: The Boyne & Aughrim - The War of Two Kings by John Kinross. This is a general introduction to the period and is quite slim. It will give you a good grounding on the Irish campaign as a whole and some idea of its place within the broader European conflict. Of the three books I consulted, it has the most political detail.
Battle of the Boyne 1690 by Micheal McNally. Much more extensively illustrated than the Kinross book, it again gives a broad overview before diving into detail on the battle itself. It follows the Osprey formula and is a good addition to the series. If you were to buy only one book, it should probably be this one.
The Battle of the Boyne 1690: A Guide to the Battlefield by Dr Harman Murtagh. This is similar to the Osprey in that it focuses exclusively on the battle and is my favourite. It’s well illustrated by Osprey veteran Richard Hook and the maps, while not as pretty as the Osprey, are good. What sets this apart from the other volumes is that it comes with a detailed battlefield guide, complete with photos taken by the author, as well as aerial photography, following the action along. It also comes with an audio tour on CD to talk you through the action. I used this book on my last trip to the Boyne and it’s as good as any battlefield guide I’ve used. Highly recommended.
Now, one thing that I realised while writing this is that this guide is actually a driving guide and gives you road directions to get to particular viewing areas (called 'stands'). I’m in quarantine with suspected COVID-19 at present, so I took the opportunity to follow the tour along in Google Street view. It’s not perfect, for example, the stand at Tullyallen church is blocked by hedges, but if you move east along the Burris, you can actually get a good view of the ground. It’s not as good as being there, but it’s not bad at all.
Also, this particular book is currently out of print and copies are quite pricey on Amazon and may not include the CD. However, while coming back from a Boyne trip, we stopped in at the Visitors Centre at Newgrange, a neolithic site, which is well worth a visit on its own account. The chaps at the gift shop there have about 20 copies of the Murtagh book left (at time of print) and they are €15 each (including CD). They can be contacted at [email protected].

CONCLUSION
Dipping a toe in other periods is a dangerous pastime for a dedicated Napoleonics man but I suspect that my Peter Dennis paper soldiers will be getting a work out in the not too distant future. Our rules adaptations were a bit rough and ready, but they gave a decent game, though we have taken certain liberties to make more of a contest of it. It would a poor show indeed to force a wargamer to emulate James III lack of nerve. As for the Boyne battlefield, I will definitely be back. There is no substitute for actually being there.
Looking for more?
This scenario was one of many that appears in Miniature Wargames Magazine, our monthly publication for all kinds of wargames! You can check out our latest issue, or previous issues by clicking here
Get your magazine hereOne Day, One Whole Army...

If you have a stack of miniatures in need of painting, preventing you from bringing anything new to the table, check out this article, where we hear from a contributor who managed to paint an entire army in a single day!
Get your paint on!
Join us in person

We can't wait for Tabletop Gaming Live 2022! An epic weekend in Manchester full of board games, card games, roleplaying games, wargames and more, with amazing exhibitors, great games, and an opportunity to game together in person.
See you there!Treat Yourself!
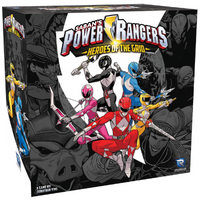
Have you visited our game store? We have everything from mystery boxes, to games and accessories – including the above Power Rangers: Heroes of the Grid, with a great discount! Head over to find your new favourite game.
Visit the Game Store
Sometimes we may include links to online retailers, from which we might receive a commission if you make a purchase. Affiliate links do not influence editorial coverage and will only be used when covering relevant products
Comments
Login or register to add a comment
No comments