


19 April 2022
|

Words by Dave Tuck. Photos and maps by Malc Johnston
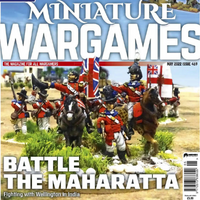
Many people consider the Napoleonic era to be the holy grail of wargaming periods. Surprisingly, apart from my 15mm Prussians and Saxons (which have not seen daylight for a considerable period), it is the period we played the least… until now.
The problems with the period are twofold. Firstly, the sheer size of most Napoleonic battles, often numbering over 100,000 combatants and secondly the rule set to be used. There are so many sets available, it is often difficult to get a set all the players are familiar with and prepared to use. We set ourselves a challenge of writing a set on no more than four pages of A4.
We wanted to play a smaller action, so that Rob Cooper’s newly completed French and British could have an outing (another Covid lockdown project) without the need for the rest of us pitching in and painting for yet another period! The battle we opted to refight was the action at Maida, fought in July 1806. This battle consisted of around 5000 British taking on a force of around 6000 French and allies, with only one cavalry regiment of French chasseur a cheval, being involved.
THE BATTLE
The conflict took place in Calabria in Southern Italy, which was occupied by the French as a stopping off point for an invasion of Sicily, which was held by the British. The French hoped to weaken the Royal Navy’s hold on the Mediterranean by taking control of the island. The British pre-empted this plan by crossing the straits of Messina, and taking the battle to the French, on the Italian mainland.
The best source for the battle is The Battle of Maida, 1806: Fifteen minutes of Glory by Richard Hopton. The title refers to the opening action where two French regiments on their left wing formed column, and attacked the English right, to be seen off by a combination of a British volley followed up by a bayonet charge. The words of Wellington, about them coming on in the same old way, and us seeing them off in the same old way seems to apply to this battle.
The action in the centre and on the French right mirrored the defeated wing and after about three hours, the British emerged victorious.
FORCES
The British force was made up of:
Right wing
- Kempt’s Light infantry including some Sicilians and Corsican Rangers
- Ackland’s brigade made up of the 81st foot and 78th Highlanders.
- Cole’s brigade made up of the converged Grenadiers and 27th foot and in reserve Oswald’s brigade of the 58th foot and the De Watteville Swiss battalion.
Arriving late was the 20th foot which had taken a circuitous route which meant they arrived on the French right flank during the action. There were a small number of 4lber guns which appear to be attached to the leading brigades. This force totalled just over 5000 troops.
Their French opponents are comprised thusly (starting from their left):
- Comperes brigade
Made up of four battalions (two from each) of 1st Legere and 42nd line with some detached skirmishers fighting on the south side of the river.
- Peyri’s brigade
Made up of two Polish battalions and a Swiss battalion.
- Digonners brigade
Consisting of two battalions of the 23rd Legere.
- Finally, an independent horse artillery battery, and 300 troopers of the 9th regiment of chasseur a cheval completed the right flank.
This force totalled around 5000 infantry and 300 light Cavalry.

QUALITY & COMMAND
In terms of troop quality, the best troops on both sides were the British Light infantry under Kempt and the French 1st Legere and 42nd Line, which we rated as guard. The remainder of both forces were rated as first class, with the sole exception of the Polish troops, who were rated as second class. This was due to the fact the Poles had already been defeated in a smaller action which took place after the British troops landed.
Reynier, the French commander had little respect for the British and their commander, whom he had met previously in the Egyptian campaign and not been impressed by. He also rated the 1st Legere very highly, and he believed he outnumbered the British forces by a considerable margin. His overconfidence led him to attack in echelon with the Legere in the usual deep columns, but the rest of the force in line. This was by no means unusual at that period of the war and had the merit of reducing casualties from the superior British artillery. His ammunition supply was also limited so attacking with the bayonet reduced his need for resupply!
A telling note from one of his subordinates, stated that when this commander asked if his men should load their muskets, he was reported to have said “Of course! The British will not give us the order” . The British, also had need for a speedy battle. They believed a large French force was on its way, and a victory would galvanise the local forces into action. I was not aware until I read Richard Hopton’s book that the scale of atrocities committed by – and to – the French from the local populace was as bad – if not worse – than that which occurred in Spain and Portugal a few years later.
BATTLE IS ENGAGED
The action commenced when the British marched from their overnight camp near the landing beach. The heat, lack of water and difficult ground (beach bog and marshland) all exhausted the British, which forced them to rest. The French forces – in a perfectly sound defensive position – saw this and thought that the British were marching away and went onto the attack. The result was a meeting engagement on the plain, with little cover or high ground.
Both sides attacked with their troops in echelon, the French from their left, leading with their light troops and the British from their right with their light troops. The battle mirrored itself perfectly with the best troops, first in action and facing each other. The French attack went in, and – after two volleys and support from the British artillery – recoiled. The centre was a far more even affair, but here too the French eventually recoiled. Only the right of the French line developed well for Reynier, where the cavalry and infantry combined were having a good deal of success. However, the 20th foot – which had been used as a decoy, and sailed up and down the coast to confuse the French as to the landing sites to be used – returned to the camp. Without any orders, acting on his own initiative, the battalion commander marched to the sound of the guns, and arrived on the French flank. The French withdrew from the battle, and – as the British had no cavalry – got away to fight another day.
Casualties were significant. The British lost around 350 killed and wounded, but the French lost over 2000 killed wounded and captured. The largest part of these were suffered by the lead battalions, which Hopton maintains were half of the overall total: attributed to British musketry and close-range artillery co-operation.

GAMING MAIDA
This then was the battle we set out to recreate and write a set of rules for. As a small battle we decide to incorporate the commanders and brigade commanders. Each was given a number between 1 and 6, on which the commander could, if attached, or in the GOC’s case, in range, re-roll any dice. Order dice, firing dice, melee dice or morale dice. The re-rolled number must however then be used. Command range is one cavalry move. So 12”.
Command and control is largely based on our preferred system of D6. Three are rolled for each regiment, reduced by one die for a third of the force lost and another at 50% losses. Our units are in 24 figure battalions, so the maths are not too taxing! Each roll of 4-6 is a pass except for militia and raw which pass on a 5-6. Each pass enables one movement to take place and – once a turn – a successful order can be used for a firing action. Attack columns and columns of route always get at least one order. Movement for each successful order is as follows:

The troop ratings determine how many dice each unit rolls for a firing or melee action. We classified the troops into five ratings. These are as follows:

Weapon ranges are as follows:

Firing is carried out by rolling the designated number of dice, determined by the troops class (e.g militia get 2 dice). A hit is achieved for every result of 6, adjusted by the following table:

For example rifles firing at under half range hit on a 6, but -1 for rifles firing, and -1 for under half range, so that drops the target number of a 6 by two so any score of 4-6 inflicts a casualty.
These results are marked using a small die in a dice caddy.
The first hits inflicted on each unit can be traded off as follows:
- If the troops are advancing, they must halt for a complete turn in exchange for losing the casualty. (They may still fire with a successful order.)
- If the troops are halted, they retire 3” facing the enemy, (and may still fire as above) in exchange for losing the casualty
- If the troops are retiring, they retire a further 6”and may not fire, in exchange for losing the casualty.
- Once a unit is carrying casualties the above options are no longer available.
MELEE
Melees take place in two stages, the first of which is to order the charge or counter-charge.
The class rating of the unit which is the same as its firing dice number on the unit ratings table, must not be exceeded after the following adjustments.

To give an example 1st class cavalry wish to instigate a charge. They need to roll 4 for line troops (see the Troop Rating Chart), plus one for cavalry charging (check the Charge Chart) so a score of 5 or under on the D6 and they can set off on the charge.
Enemy may try to react out of sequence by carrying out the above test, and – if they pass – carrying out the appropriate action. So if we assume the target for the cavalry above is a militia infantry unit in line they need to roll 2 for militia (Troop Rating Chart), with no other adjustments, so on a 1 or 2 they stand and may fire, otherwise they are disordered and fight at a disadvantage.
Emergency Actions are also resolved by the above table. To give an example of one of these, Guard troops rating 5, are in attack column and wish to form an emergency square as they have been surprised by enemy cavalry. They need to roll a 5, plus one for attack column formation, minus 2 for the action being an emergency. If they roll a 4 or under on a D6, they form the square but – if they fail – they remain disordered in a column.
If the score required is zero, for instance, militia in line trying to form a square as an emergency action, then the task is just too difficult, and the troops are not capable of carrying out such a stressful action.
STANDING AGAINST A CHARGE
If infantry or artillery do stand against a charge, they may attempt to fire at the charging unit.
Roll a D6. On a result of 4-6 they fire at short range but on a roll of 1-3 they fire at long range. British and Guards add 1 to the die roll; however militia and raw troops deduct 1.
If the charging unit takes casualties it must pass a morale test before charging home. If it is passed, a melee is fought, using the melee rating of the appropriate troop class after adjusting for the factors on the following table. Hits are achieved by rolling an adjusted score of 6.

Hits are calculated and the loser suffers the difference between the two sides results. After a melee any troops winning, or drawing are disordered for one successful order roll (the cavalry are ‘blown’). Losers are disordered (‘blown’) for the number of order rolls covered by losses suffered. The result of this is that Cavalry may not charge when ‘blown’ and can only halt or retire.
To give an example, two cavalry units clash: Hussars and Lancers. Both line class. They roll 4 dice each, The Hussars hit on 5-6 (6-1 for charging cavalry) the Lancers hit on 4-6 (6-1 for charging cavalry and 1 for Lancers in the first round). The Hussars score 1 hit, the Lancers 3. The Lancers now need to roll one successful order in the next order phase to rally, as the winner, whilst the Hussars need to roll three successful orders to rally as they are the losers.
MORALE
Morale tests are carried out using this procedure. Roll 4 Average Dice and adjust for the following factors:

COMMAND RATING
The Brigade commander’s ratings were determined by rolling two D6 and the difference in the scores – if any – gave the Brigade Commanders rating level for the Morale Adjustment Roll Chart. This is the number added in any morale test and is also the number of re-rolls available to the commanders Brigade during the battle.
As examples, we gave the overall Commanders 5 for Reynier and 4 for Stuart, as Reynier seemed to be more charismatic, and was more involved in the action. If you have any better information on the Commanders abilities feel free to change these numbers.

DO YOU HAVE THE TROOPS?
Finally, if you do not have Napoleonic troops available, I used card squares and lines to represent the various Brigades whilst working on this rule set, and it worked perfectly well. I also changed the movement and ranges to centimetres for use on the dining room table. I did change it back up when I got to use the 12 by 6 and the magnificent troops used in the photographs, so thanks Rob!
Finally, the rules came in at under three pages of A4 and we think they work well, why not give them a try? Download them and have fun!
Looking for more?
This scenario was one of many that appears in Miniature Wargames Magazine, our monthly publication for all kinds of wargames! You can check out our latest issue, or previous issues by clicking here
Get your magazine hereOne Day, One Whole Army...

If you have a stack of miniatures in need of painting, preventing you from bringing anything new to the table, check out this article, where we hear from a contributor who managed to paint an entire army in a single day!
Get your paint on!
Join us in person
We can't wait for Tabletop Gaming Live 2022! An epic weekend in Manchester full of board games, card games, roleplaying games, wargames and more, with amazing exhibitors, great games, and an opportunity to game together in person.
See you there!Treat Yourself!
Have you visited our game store? We have everything from mystery boxes, to games and accessories – including the above Power Rangers: Heroes of the Grid, with a great discount! Head over to find your new favourite game.
Visit the Game Store
Sometimes we may include links to online retailers, from which we might receive a commission if you make a purchase. Affiliate links do not influence editorial coverage and will only be used when covering relevant products
Comments
Login or register to add a comment
No comments