


18 May 2022
|

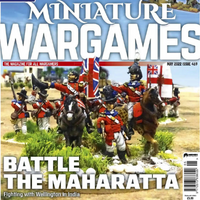
A Tribute to Peter Gilder’s Sudan Campaign Rules
Words by Dave Tuck Photos by Malc Johnston
Peter Gilder was a great contributor to our hobby, and to my mind an under-appreciated one. His designs for Hinchliffe and Connoisseur still have a flair for movement and activity despite being over 20 years old. Many of the units he owned – but which he did not paint – were featured in early issues of this magazine, and the concept of a wargaming holiday break was pioneered by him. He also introduced the use of textured terrain modules and built some great scenery items. Dennis Coleman, the owner of Hovels the resin building manufacturer, introduced me to Peter, and sourced several of my 28mm armies, which are still going strong. I did a year at Hull, doing my accountancy foundation course, and Peter took me under his wing, introducing me to the North Hull Wargames Club, and – from there, – several trips to the Wargames Holiday Centre, near Scarborough.
The set up there was amazing: two banks of parallel tables over 30 foot long and 6 foot wide, with a further 3-foot shelf, behind each, where the reserves were deployed. All of those were stacked sky high with extremely well painted figures, of various periods.
The wargaming period I was most impressed by was the Sudan, fired up by the movie Khartoum, and various versions – some better than others – of The Four Feathers. A few years ago, I purchased a large collection of 28mm Sudan figures, some of which, I was told, spent time at the Holiday centre, and until recently, they languished in filing cases awaiting re-basing. They were covered in budgie grit, and my previous attempts to remove them from the plywood and this pernicious ground covering, led to broken figures and ripped skin! Who would have thought leaving them to soak up to their bases in a tray of water, would make removal so easy. Well clearly not me!
Having sorted this un-basing out, Malc and I – sticking, sand texturing and repainting the bases as we went – had now availed ourselves a huge force. So the obvious thing to do was to recreate a version of the great game I witnessed in Scarborough, all those years ago. I do not have access to the square footage he had available, but a 12 by 6 foot table, was not small by any means.

RULES
In the original rules, Peter adapted the ideas developed by Ian Beck in a set of rules called Pony Wars, (or ‘B troop ain’t coming back’). These I understand have recently been reprinted by Baccus. I also understand that Peter’s notes and play-sheets have been lovingly reconstructed into a faithful version of the rules used back then. They are sold under the title Sands of the Sudan, by Caliver Books in the UK and can be explored at the blogsite, With Pyjamas through the Desert (just google it! Ed.).
In brief, the players all have a role on the Imperial or Egyptian side and the Dervish and Ansar forces are controlled by the umpire, with their actions determined by their current situation and the roll of a dice. A similar ‘AI’ system is used in the Osprey rule set, The Men Who Would be Kings, delighting in the name of Mr Babbage. All of these stem in some way from the Pony Wars set, which was revolutionary when first introduced. If you ever get the chance to play it, it is fabulous!
It also allows for solo play and adaptation to other periods of history, and it can be bolted on to different combat and movement systems with a little thought. Crusaders and Saracens, and Romans and Barbarian tribesmen, or North-West Frontier actions all spring to mind.
Most of the scenarios involved Imperial Forces marching to an objective, guarding a convoy (or the Governor’s wife!) or relieving an outpost under attack. However, we wanted to use the system to fight a historical battle, namely the Battle of Ginnis.

GINNIS
This was fought on December 30th 1885 and it was notable as being the last battle of the campaign triggered by the attempt to save General Gordon. After this the British forces withdrew, and the new Egyptian army took over. Finally, and most famously, it was the last major battle the British fought wearing their Redcoats. Both sides feared invasion and conquest by the other, and they concentrated their forces around Ginnis.
FORCES
The British had two brigades and a cavalry reserve.
The first was made up of the 1st Berkshires, The West Kents, the Durham Light infantry and six guns from the Egyptian artillery.
The second consisted of the Yorkshire regiment, six companies of the Cameron Highlanders and companies of the IXth Sudanese and the 1st Egyptians. Artillery support was provided by a screw gun battery and two Gardner guns.
The cavalry reserve was made up of companies of the mounted infantry, the Egyptian camel corps, the 20th Hussars and a squadron of the Egyptian cavalry. It is noticeable that British and Egyptian troops are intermixed in an unusual manner for a Colonial
British force.
A gunboat – the Lotus, used in the vain attempt to save Gordon – was available as naval support. It mounted a Gatling gun and some riflemen.
THE BATTLE
The battle commenced with the second brigade marching to attack Kosha, whilst the first brigade wheeled around to attack Ginnis. The cavalry acted as a link between these forces but otherwise took no part in this mainly infantry slog.
Kosha was cleared after a short fight, whilst the action at Ginnis was more stubborn, with the final remnants of Ansar riflemen not being driven off until the next day. It required artillery support to enable this to happen.
Little is known of the Mahdist forces, or the proportion of riflemen compared to tribesmen. Casualty figures also vary from British total casualties of as low as 48 killed and wounded, to as high as 150. Dervish figures range from 600 to 800.
In some ways this lack of information actually makes fighting the action as a wargame a lot easier. We used British and Egyptian battalions of between 30 and 48 figures, and Mahdist forces organised into units of four bases, mounting between 24 and 32 figures. We literally set out every Mahdist figure available to us! It gave us a headcount of around 350 British, including the Cavalry force of 30 (which was little used), against an Ansar force of around 900 figures. It was a splendid but intimidating sight for the British players.
THE GAME
The British were only given the rules relating to their forces, so they knew how far they could march, the firing options available to them, how to remove disorder and how the ammunition restrictions worked. Crucially, they did not know how far the Mahdists moved; how charge bonuses worked; what triggered a morale test for their enemies; or how melees were resolved. They found these out when the umpires informed them of the number of dice to roll, and the scores required. They witnessed the Mahdist rolls but had to work out the scores they required, with no explanations given by the umpires other than a bland “the Mahdists score 7 hits” (or 8 or 10 depending upon the dice gods!).
This made for a tense game with the British monitoring their ammo usage and trying to get the pack camels and mules up to re-supply them during any lulls in the action.
After an eventful game, history was repeated and the British and Egyptians claimed a victory. All the players said it was a novel experience fighting on the same side, with a common objective. There was no shortage of players volunteering to aid the umpire in a second match, where the sides will be reversed. It was great fun, and hugely satisfying for me to put on.
SO HOW DID IT WORK?![]()

The British and Egyptian forces rolled for their commander’s abilities. On percentage dice 70% and over, meant very good. Over 60% was good; over 40% average; and any lower its commanded by an incompetent buffoon. After throwing dice, it turned out that the forces were – fortunately – commanded by very good and good commanders.
The command ability of the leader indicated the score required on any ‘Pluck’ test, used to remove disorder markers. Very good commanders need to roll higher than 4 on a D10; good need higher than 5; average over a 6 and the incompetent buffoon an improbable 8 or more.
AMMO
The next task was to roll for the supply of ammunition each unit has. Two D6 are rolled, and the total scored placed in a small dice holder by each unit. British and the IXth Sudanese battalion add 3 to the score rolled, to score a maximum of 12, reflecting their better training, elan and commissariat.
DEPLOYING THE OPPOSITION
The Ansar and Hadendow (known to the British as ‘Fuzzy-Wuzzies’, which became a term of respect, due to their fierceness and bravery) were deployed, in defensive locations. Their forces move after the British, thereby reacting to them. Their actions throughout the game were controlled by a roll of a D6. Where the result given appeared implausible (a very rare occurrence), the umpire applied common sense.
After rolling the D6, the following table was applied:
 1. Go to ground: troops become impossible to target at ranges over 12”, and only fight at half effect if contacted.
2. Act cautiously: troops previously on charge orders go to ground, others try to move towards friendly units. Firers fire at enemy from long range.
3. Move: All troop types move towards the nearest enemy, with chargers attempting to charge, and firers moving to short range.
4. Combine: As 3 but with the option to join forces wit nearest friendly unit before charging. Firers fire at short range.
5. Charge: Troops do not need to test, and if they fail to contact the enemy they continue to charge unless 1 or 2 rolled, or morale test stops them. Firers fire at short range.
6. Maximum Charge: the maximum move distance of 15” Firers also charge the maximum distance, only firing if they do not contact the enemy.
MOVEMENT
Movement was very straightforward:
- 6” for foot and artillery
- 12” for cavalry, with camels having a move of 6” plus a D6 die roll.
Ansar are the same as the above plus an additional D6 for all. This came as rather a shock to the British!
The British may double, adding an extra 50% to its movement. If troops double for two consecutive moves, on the roll of 1 on a D6 they obtain a disorder, with the roll increasing to 1 and 2, and so on, for each subsequent move.
Note that the Ansar charge bonus is also an extra 50%.
DISORDER
Disorder is removed by troops remaining stationary for a turn, only firing on troops charging them, and beating the Commanding Officers pluck rating on a D10 (as noted earlier). A failure means the disorder remains with the unit.
Each disorder acquired forces disordered units to fight and fire at one worse rating than normal.
![]() FIRING
FIRING
 FIRING
Ranges are:
- British rifles 36”
- Egyptian rifles 30”
- Artillery 48”
- Machine guns 36”.
Note that Ansar rifles have a range of only 18” but have no ammunition limits.
Under half the total range is classed as short range. At short range 1D6 dice are rolled per 2 figures, and at long range per 4 figures. Hits are achieved on a roll of 4,5,6 for British and Egyptian rifles, and on a 6 only for Ansar.
The number of dice rolled is reduced by 1/3rd if the target has gone to ground, is in cover or is moving Cavalry or Camelry. These effects are cumulative.
Infantry are allowed to rapid-fire at short range, when one die is rolled per figure. Usually, ammunition is reduced by 1 for each shot fired, but it is reduced by an extra 1 when rapid firing.
ARTILLERY
- British artillery rolls a total of six D6, hitting on 4,5,6 at all ranges.
- Ansar artillery roll four D6 hitting on 5,6.
The above 1/3rd reductions still apply.
MACHINE GUNS
British and Ansar Machine guns roll as their respective artillery. However, if they roll more 1 scores than 6’s the machine gun jams, a round of ammunition is used, and it can try again next turn! The number of dice rolled is reduced proportionally for casualties suffered.
THEY DON’T LIKE IT UP ‘EM!![]()

Melees are calculated in a similar way to firing.
Both sides roll a D6 per 2 figures. Ansar and mounted troops score on a roll of 4,5,6. British and Sudanese on a 5,6, with Egyptians hitting on a 4,5,6. Optionally Hadendow can score on a roll of 3,4,56.
The winners inflict the difference in the two totals as casualties and the losers inflict half the difference.
To establish the melee winner, add the firing casualties suffered during the charge, to the above score, highest score wins. The loser withdraws a full move, and in the event of a draw the attacker withdraws a full move. If cavalry win a melee, they may follow up the balance of their movement, not used, to contact the enemy.
If British forces lose a melee or lose an officer, they must beat their officers pluck rating (in the event of an officer loss, that is the rating of the doomed officer’s replacement!). Should they fail they suffer a level of disorder.
Other than and passing a pluck test, disorder can also be removed by remaining stationary; or not firing or engaging in a melee for a turn.
DEATH OF AN OFFICER
Officers perish on a roll of double 1 on two D6 which are rolled for each casualty suffered by a unit.
British forces do not test for morale, they simply become more disordered or run out of ammunition. They will not surrender.
NATIVE MORALE
Natives test as follows:
Units start the battle as four or eight stands. In a four-stand unit each full stand adds 25 % and on an eight-stand unit 12.5%
Add:
- 10% if Hadendow.
- 10% if camelry or cavalry.
- 5% if at long range from nearest enemy.
Deduct:
- Deduct 1% for each casualty suffered during the turn.
- Deduct 10% for each disorder.
Roll percentage dice and check the result: a score of under the above target number is a success and the unit carries on. In the event of a failure the unit goes to ground or retreats a charge move directly away from the enemy.
EXAMPLE
To give an example a four-stand Hadendow unit loses 8 casualties during an attempted charge. It starts at 75% (three remaining stands) adds 10% for Hadendow and deducts 8% for 8 casualties suffered this turn. (It also needs to roll a D6 for losing a stand and on a roll of 1 is disordered so will fight at a disadvantage hitting on a 5,6 rather than a normal 4,5,6.)
Assuming it is not disordered, this means that a roll of under 77% allows the unit to carry on.
CONCLUSION
These are a very simple set of rules suitable for solo play or for a very different wargame experience, with players acting in a co-operative way. There is of course nothing to stop an element of role playing, with personal rivalries coming to the fore with caddish British officers, who have probably cheated at bridge and all sorts of other bad behaviour, getting their come-uppance.
Just remember to act in the spirit of Henry Newbolt and “Play up! Play up! And play the game!”
From Vitai Lampada by Sir Henry Newbolt.
Looking for more?
This scenario was one of many that appears in Miniature Wargames Magazine, our monthly publication for all kinds of wargames! You can check out our latest issue, or previous issues by clicking here
Get your magazine hereOne Day, One Whole Army...

If you have a stack of miniatures in need of painting, preventing you from bringing anything new to the table, check out this article, where we hear from a contributor who managed to paint an entire army in a single day!
Get your paint on!
Join us in person

We can't wait for Tabletop Gaming Live 2022! An epic weekend in Manchester full of board games, card games, roleplaying games, wargames and more, with amazing exhibitors, great games, and an opportunity to game together in person.
See you there!Treat Yourself!
Have you visited our game store? We have everything from mystery boxes, to games and accessories – including the above Power Rangers: Heroes of the Grid, with a great discount! Head over to find your new favourite game.
Visit the Game Store
Sometimes we may include links to online retailers, from which we might receive a commission if you make a purchase. Affiliate links do not influence editorial coverage and will only be used when covering relevant products
Comments
Login or register to add a comment
No comments