


19 September 2019
|
 The bunker, made entirely from foam
Rock and Roll
Many moons ago I was offered a foam yoga block and asked if I had any use for it, so I did what any gamer would do when presented with a piece of exercise equipment, I made an Earth Elemental out of it, but that’s a whole other story. For those not familiar with yoga blocks, they are brick-like in shape and usually made from cork or foam, designed to help yoga practitioners from overextending themselves. But I’m mentioning it now because during a recent project I wanted to create a large rocky landscape and while looking at various materials to build the rocks out of, I remembered the yoga block and the rock miniature I’d made before. The yoga block I’d previously used was made out of EVA Foam (Ethylene-vinyl acetate, for those in the know) – it’s the same stuff that’s used for garage floor mats, inserts for tool cases, children’s toys and what your local cosplayer has been making weapons and armour out of for years. It’s a dense yet spongy foam, easy to cut but hard wearing, very lightweight and cheap if you shop around a bit. It also takes paint well and you can glue it together. So I bought myself a couple and using a slightly different method to my previous efforts I discovered how easy it was to make realistic looking rocks from the foam. Shortly after I started the project I did a search to see how other gamers had been using foam to see if I could pick up any good tips. To my surprise I found almost nothing, there were a few websites and you tube videos showing EVA foam modular wargame mats and one or two terrain pieces, but that was it. It appears the wargaming world hasn’t embraced EVA foam yet which I find strange as it’s now my ‘go to’ building material, so I thought it was about time to give it a bit of publicity.
THIS FOAM ROCKS
You can get EVA foam as mats almost anywhere but the foam yoga block is better for making rocks because it has more bulk to it and a standard yoga block size (9"x6"x4") gives enough material to make several rocks (plus detritus). Yoga blocks come in various colours, the one I’d previously been gifted was bright green, although you can paint the foam I’d choose a more suitable base colour to compliment what your final terrain will look like. For my rocks I went for black but brown would have worked.
.jpg)
When you have your yoga block start by simply cutting the block with a craft knife (as always be careful using the knife), you do not need to cut through the entire block, just make a cut deep enough to be able to get your fingers in to tear the block apart. Tearing the block in this way produces a fantastic rocky texture (better than anything I could have created by whittling away at it). You can still cut right through the block if you prefer a cleaner more precise edge, but for this I wanted the texture that tearing produces. Once you’ve made a few cuts and torn off a few chunks, you’ll soon get the hang of how you can cut the block up to create big or small rocks to suit your needs. You can also stick the rocks together to make other terrain features: I prefer to use a hot glue gun but you can also use standard contact glue (I’ve not done extensive glue tests on EVA Foam so if you do want to use other glues I would recommend looking for tutorials from Cosplay experts on the glues they use).


ROCK PAINTING
You can paint the rocks by hand or you can also use normal spray paints. I’ve cut out some more rocks from the yoga block to demonstrate one method of painting them. For these rocks I’m going to paint them with standard car spray paints (unlike other foams, EVA foam does notmelt if sprayed). Keeping away from the stereotypical grey most often used for rocks, I like to go for a sandstone colour. I start with a sporadic covering of Halfords red primer, effectively just making a few passes with the spray can: if you have chosen a suitable base colour for your rocks you do not need to completely cover the foam, and for these I’m happy to let the black show through. I follow the red with a similar application of Halfords yellow primer. Again I’m not looking to completely cover either the black foam or the red. Halfords also do a range of camouflage paints so for a finishing touch I used their khaki spray, applying it like a highlight to help blend the colours together. The end result picks up the rocky texture really well. When painting the foam in this way I have never bothered to varnish them. I don’t think it is required: the first set of rocks I created were used in a club game and spent a year being taken to shows, being dumped in a bag (or used as packing for other more fragile parts of the game!) and handled by many gamers interested in how they were made. The only signs of wear and tear amounting to a bit of paint rubbing off from a few edges, and that further demonstrated the advantage of picking a suitable base colour for the foam.


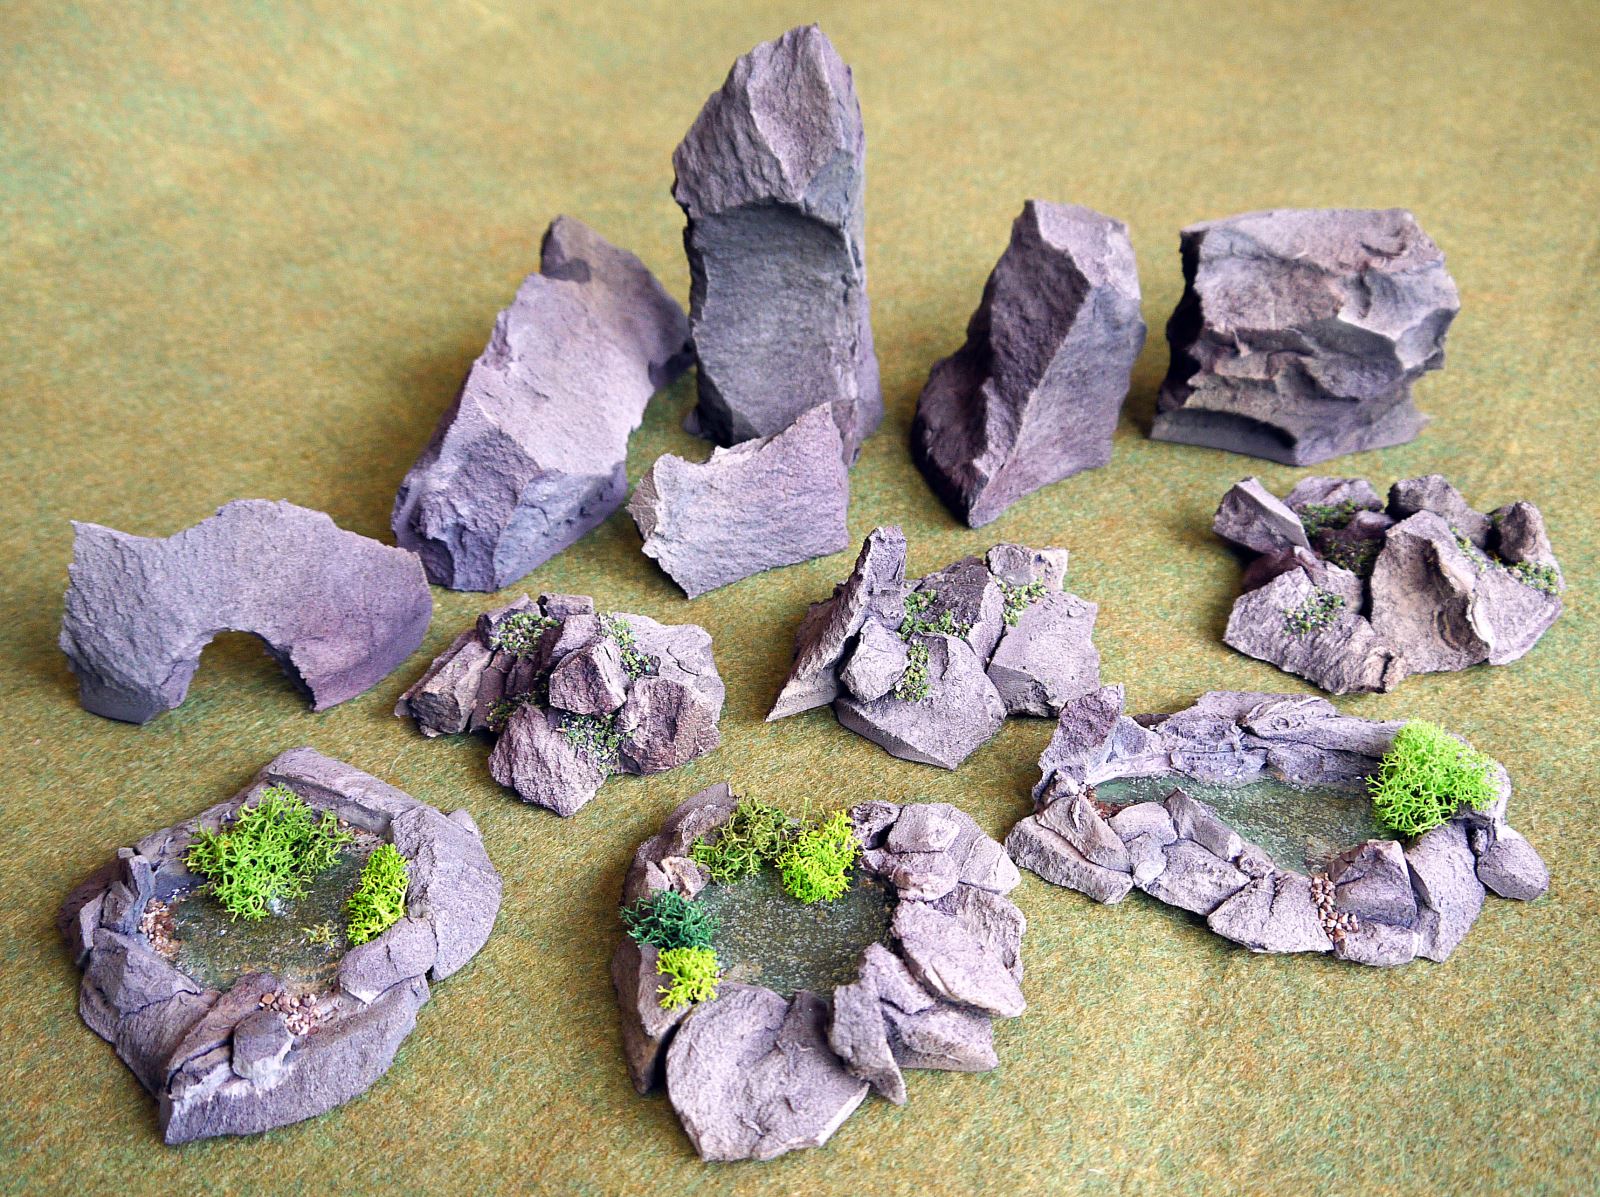
Using the same painting technique I’ve also made some rock formations, this time adding a little sprinkle of flock for effect, and if you really want to show off you can even use resin water effects to make some nice looking rock pools. There’s nothing to stop you making towering monoliths, ancient tors, mysterious cave entrances or even everyday scenery like dry-stone walls for your battlefields.
GETTING CREATIVE
Another advantage of EVA foam is that you can also have nice smooth edges by either cutting cleanly through it, or buying it in mat form. Here we have another rock from the same yoga block, but this time I’ve cut out a section in order to add a building/bunker entrance to it. Taking a foam garage floor mat I’ve cut it into strips and then into blocks to make the building with. The look I want for this is a makeshift block structure. For sticking these blocks together I’ve gone back to the glue gun, and I’m going to overdo it because the excess glue will look like mortar oozing out between the blocks. Once the walls are complete I’ve used another piece of the floor mat for the roof. This time I’ve just scored lines onto the foam rather than cut through it. A quick check to make sure it fits and it’s time to paint this as well. For the buildings I’ve sprayed it with grey primer and then the same Khaki colour I used before as a highlight making for a very simple but effective bunker entrance carved out of the rock. By not gluing the entrance piece to the rock I was able to make an alternative entrance, this time a Mech hanger for my 3mm Sci-fi forces.


JEREMY CLARIDGE
This article originally appeared in the May 2018 issue of Miniature Wargames. Pick up a copy of the latest issue here or subscribe to make sure you never miss an issue.
Comments
Login or register to add a comment
No comments