


27 February 2019
|
 Hobby tips: useful bits of kit for a hobbyist
The tools of war
Most wargamers usually start out with more or less the same tools at their disposal. They’ll have some brushes (often just small, medium and large), some paint, glue, PVA, something to decorate bases with, clippers, a spray primer and of course some miniatures to paint and game with.
If you love wargames, pick up Miniature Wargames Magazine here!
This is all useful stuff that will stand wargamers in good stead for the most part. However, over the course of my journey across the hobby, I’ve come across several other tools that have become a mainstay in my arsenal for whatever project I’m working on.
The humble box-cutter

A simple cutting tool has many different uses when it comes to hobbying. The most obvious areas are converting miniatures and creating terrain, though its use certainly isn’t limited to these aspects. For one thing, a box-cutter is incredibly good for removing mould lines on miniatures. Simply holding the blade at a slight angle and scraping it along the mould line removes the offending plastic or resin without damaging the surrounding area too much. Though removing mould lines takes a bit of effort, the results are definitely worth it.
Some may think it odd that I should mention a box-cutter over a dedicated hobby knife, but I think the former holds two distinct advantages over the latter. Firstly, a box cutter’s retractable blade means they’re far safer than a lot of hobby knives: this humble writer may or may not have a rather deep scar from a quite nasty accident with a hobby blade!
Secondly, they’re dirt-cheap and you can usually get them by the dozen. Their longevity is extended by the fact that you can remove sections of the blade that have become blunted, something I only learnt recently! Those little black tips at the end of the box-cutter are removable and have a thin slot in them: fitting the blade into the slot and bending it will snap the blade along one of the grooved segments etched in intervals along its length. Just make sure to safely dispose of the removed section by putting it straight into a recycling bin.
A jeweler’s saw

You’d have thought that already having a cutting implement means that a saw might be overkill, but it certainly isn’t. The major downsides of using a knife are that a) pressure has to be applied when cutting something and b) knives only work for cutting up objects below a certain thickness. Whilst the second issue is self explanatory, the main problem I’ve had with the first fact has been when it comes to cutting up miniatures for conversion. There’s been a number of occasions I’ve cut through one part – an arm, say – only for the knife to carry on through and leave an unseemly gash in the part underneath it. You're also quite limited in terms of cutting angles, since miniatures often have to be rested against a flat surfce in order to be succesfully cut into.
A Jewelers saw solves both these problems by allowing you not only to cut through greater thicknesses, but also have a far greater degree of control as you do so. Best of all, you can get blades thin enough that when it comes to the actual sawing part you won’t end up taking a crucial millimeter or so off an with you when separating a piece into two.
A hand drill
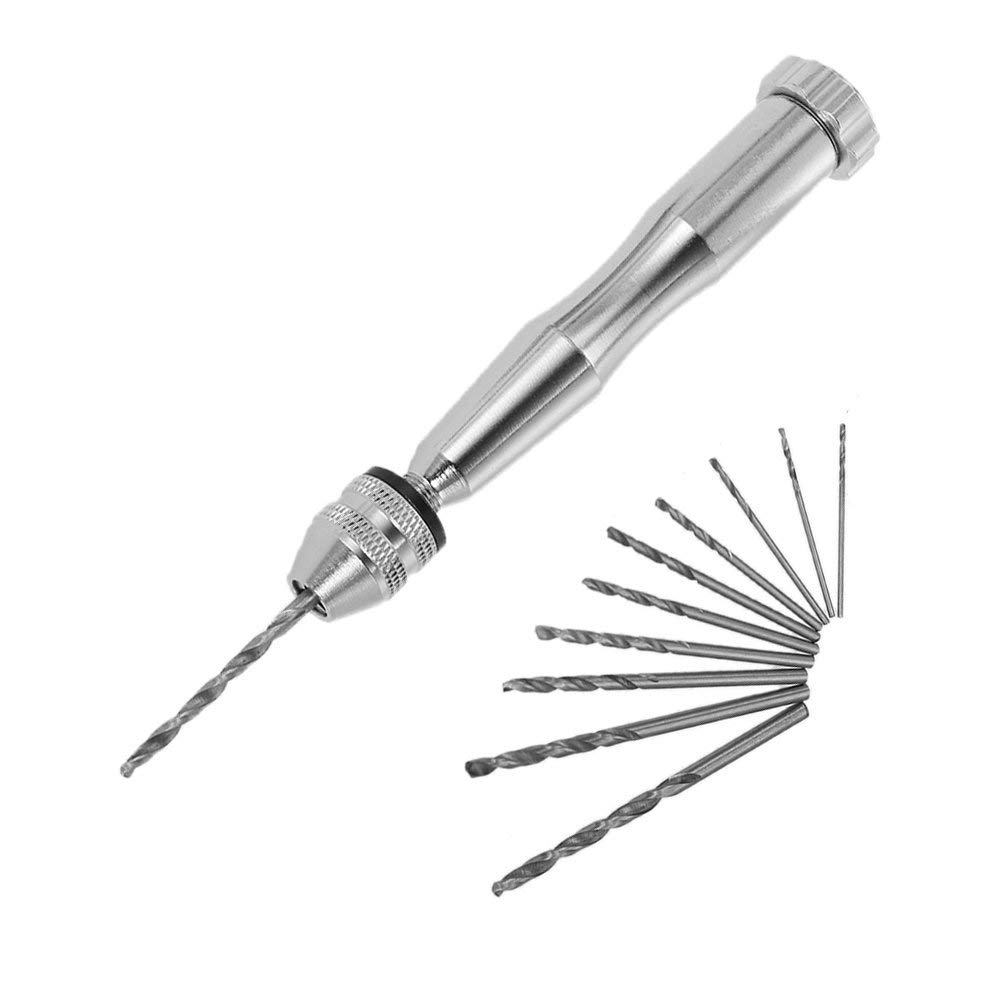
A hand drill is one of those tools you wouldn’t imagine has many uses, until you own one and start using it. For one thing, it’s used for pinning metal miniatures together. Pinning is a process whereby the bond between two metal miniature components is strengthened by having a small metal rod inserted through them. Metal miniatures these days are usually primarily made out of pewter, and most hand-drills are strong enough to bore through them, though obviously it takes more effort to do so that it would with softer materials like resin or plastic.
Other uses I’ve found for my humble hand drill have including hollowing out the gun barrels on Space Marine bolters, and making bullet indents on armour. The trick to the latter method isn’t to drill too deeply (otherwise the end result just looks like what it is; a hole drilled into a miniature), but to make only a few rotations so that you end up with a circular indention on whatever surface you’re working on.
Comments
Login or register to add a comment
No comments